16.7.11

photo project | 17: Ginger Ale Tea.


Ginger tea with honey and lemon in lomo. 

Effectively calms my sick throat. Ahh, love, this one is.


the best chocolate chip cookie. ever.

This time I can be confident in saying that I have finally found the best chocolate chip cookie recipe.


FINALLY, FINALLY.

I’ve had the recipe tucked away in my trusty pink notebook for weeks, probably months, but never had the time to test it out. Oh wait, let me edit that.. I was just too scared to try. I’ve had my fair share of flat, sticky non-cookie-looking-and-tasting cookies.

Thank God I’ve finally gotten over that phase. I can now bake as many chocolate chip cookies as I want! Hurrah!

I got the recipe from Kim of Lovin’ from the Oven, I tweeted her some few months ago if she can recommend a good chocolate chip cookie recipe. And boy did she give me one! She replied back with a link to her favorite cookie recipe, which incidentally is the Cooks Illustrated Thick and Chewy Chocolate Chip Cookie recipe. (I can’t for the life of me view the recipe from their site cos you need to register – and the registration isn’t free!)

If you’re looking for a great chocolate chop cookie recipe, look no further – this is it! It’s perfectly crisp on the outside yet soft and chewy inside. I love the texture and play of flavors… Ah, I’m just in love with it!


Playing with Retro and Lomo
functions on my phone.


And oh, the best thing about this recipe? No mixer needed! All you need is a wire whisk, wooden spoon, and a mixing bowl. Awesome, yeah?

Cooks Illustrated Thick and Chewy Chocolate Chip Cookie  
2 cups + 2 tbsp all-purpose flour
1/2 teaspoon baking soda
1/2 teaspoon salt
3/4 cup unsalted butter, melted
1 cup packed brown sugar
1/2 cup white sugar
1 tablespoon vanilla extract
1 egg
1 egg yolk
2 cups semisweet chocolate chips 
Sift together the flour, baking soda and salt; set aside.  
In a medium bowl, cream together melted butter, brown sugar and white sugar until well blended.   
Mix in vanilla, egg, and egg yolk and  beat until light and creamy. Add in flour mixture until just blended.  
Stir in the chocolate chips using a wooden spoon.  
Chill the dough for at least an hour.   
When ready to bake, preheat oven to 325F. Scoop cookie dough on cookie sheet lined with parchment. Cookies should be 2-3 inches apart.   
If you're baking small cookies, bake for 8-10 minutes, or until edges are golden brown. If you're baking bigger cookies, bake for 12-15 minutes. Cool on cookie sheet for 5 minutes before transferring to wire racks to cool completely.

Check the recipe here.

11.7.11

cupcake project | 06: flour bakery’s chocolate cupcake

What? I’m back to my chocolate obsession?!

Yes, yes, yes. A resounding yes!

I figured that although I have a good dark chocolate cupcake recipe and a go-to devil’s food cupcake recipe, I still haven’t found my go-to chocolate cupcake aka the BEST chocolate cupcake recipe yet.
So, on with my search for the best. I stumbled upon two recipes yesterday – Hummingbird Bakery (recipe here) and Flour Bakery’s (recipe here) chocolate cupcakes.

I really had a hard time choosing which recipe to try last night, and well, you have probably guessed by now, Flour Bakery’s recipe won. I chose it cos it uses unsweetened chocolate and cocoa powder, not just one of the two. If you’re a regular reader of my blog, you also probably know by now that I have a blossoming love affair with tablea.

Knowing that I can use both regular baking chocolate and tablea for this recipe… I’m SOLD!

I love how the cupcakes turned out – moist, dark, chocolate-y and delicious. All of that even without frosting! It totally melts in your mouth.

DSCF3445
Now, just a disclaimer. This is just for me, ‘kay? I’ve tried a lot of recipes which got rave reviews but some of them didn’t wow me. This may also be the case for any of you who want to try the recipe –- it may or may not work. That’s the fun and challenging part! :)

For the frosting, I decided to use my chocolate frosting recipe with a few changes.

Want the recipe? Here you go.
Flour Bakery's Chocolate CupcakeAdapted from Three Clever Sisters  
2 oz unsweetened chocolate, chopped
2 pcs tablea, chopped
1/4 cup Dutch-process cocoa powder
1 cup sugar
1/2 cup unsalted butter
1/3 cup water
1/2 cup milk
1 egg + 1 yolk
1/2 tsp vanilla extract
1 cup flour
1 tsp baking powder
1/2 tsp baking soda
1/2 tsp salt  
Line muffin pan with cupcake liners. The recipe said it makes 12 cupcakes, I got 18. Haha.  
In a heatproof bowl, combine chocolate, tablea and cocoa powder.   
In a saucepan over medium heat, heat the granulated sugar, butter, and water, stirring occasionally, until the butter melts and the sugar dissolves.  
Pour the butter mixture over the chocolate and whisk until smooth and all the chocolate is melted. Let cool. When bowl is no longer hot, just a little warm, whisk the milk, egg, extra yolk, and vanilla into the chocolate mixture until combined.  
In a separate bowl, whisk flour, baking powder, baking soda and salt until blended. Add the flour mixture to the chocolate mixture and whisk until smooth.  Let the batter sit at room temperature for 1 hour or cover and refrigerate for up to 3 days.  
[I was impatient, I refrigerated the batter for about an hour and proceeded to baking. The batter wasn't as thick compared to Three Clever Sisters'.]  
When ready to bake, preheat oven to 350F. Bake cupcakes for 25-30 minutes, or until tester comes out clean. 
DSCF3451
Chocolate Frosting  
1/2 cup semi-sweet chocolate chips (or a mix of chocolate melts, chocolate chips and unsweetened chocolate), melted
1/4 cup unsalted butter, softened
1/4 cup shortening
1/4 cup unsweetened cocoa powder
3 cups powdered sugar, sifted
1 tsp vanilla extract
2-3 tbsp milk, as needed  
Whisk powdered sugar and cocoa powder together.  
In a large bowl, beat butter and shortening together. Gradually mix in powdered sugar until blended. Add in melted chocolate and vanilla. Add in milk one tablespoon at a time. Beat until desired consistency is reached.  
* If frosting is too thin, add 2-3 tbsp powdered sugar at a time. If too thick, add 1-2 tsp milk at a time.
     DSCF4007      DSCF3998
       DSCF4006     DSCF4001

10.7.11

red velvet brownie pops.

I remember telling my work friends that I’ll never attempt to make brownie/cake pops EVER.

Why?

Cos I think it’s too time consuming. Too tasking.

You know me, patience is never in my vocabulary. I don’t even know what made me pursue baking.

But then, the tides have changed. After making red velvet brownies three times this week, I wanted to break the monotony.

Since I’ve baked red velvet brownies (again!) last night, I’ve cut half of the baked brownie into squares and then the other half I crumbled into pieces.

That was the start of my brownie pop adventure.

DSCF3441
I tell you, it is easy. Really easy. It’s just too time consuming.

But it’s very rewarding.

I swear. You gotta try one. I got the recipe from Bakerella and The Kitchn.

I used my red velvet brownies and the “best frosting ever” for the pops then white chocolate ganache for the dip. Since I didn’t have lollipop sticks on stock, I used skewers instead. Hahaha.

I have to admit that using ganache for the dips instead of candy melts was a bit challenging. It didn’t harden well, it melted. I had to dip them twice… Or thrice. Next time I’ll make these, I’ll definitely go for candy melts.

And the dipping process… It takes practice. I found out that poking the sticks to the balls before coating them with the ganache worked best. Poke, dip and twirl, and set on a cupcake liner filled with colored [candy] vermicelli. That’s it. Oh, and then sprinkle with more colored vermicelli.

The coating experiment was successful with eight pops. I have about 8-10 sitting on my kitchen table – all a mess, waiting to be eaten. I hope I get to them before the ants do. Haha.

I am still testing if they’d set well in room temperature. I hope they do.

For now, let’s feast on them brownie pops.

Cheers!

DSCF3440

8.7.11

photo project | 16: Paradise.

I recently came from a four-day weekend. Wait, let me edit that... A very relaxing four-day weekend.

How did I spend it?

Not at home, this time. I went to an island somewhere in the country. Hee, sorry, but I can't tell you just yet where it is. Let this be a game of some sort. I'll let you know at the end of the month. ;)

While the travel time is a bit long, and the number of transfers many, it was definitely worth it.

Imagine waking up to these majestic scenes every morning:


Wouldn't you love to live like this? I would. If only money and resources wouldn't matter.

A few more photos to tease you - all of these are within the resort's vicinity. All you need to do is walk a few meters. Paradise is literally within your reach.


Very relaxing, indeed. 

7.7.11

red velvet brownies, anyone?

It feels like forever since I last baked something.

I just had too much going on the past week that I can't squeeze baking in my daily routine.

Anyway, it's high time that I break the silence with something very nice.

Uh, nice is an understatement. I can't find the right word to describe these rich brownies.

Okay, brownies. They don't even look brown to me. And they have the slightest chocolate taste.

But well, who am I to argue? They're red. They have chocolate. They're adapted from a brownie recipe.

So yes, what a pleasant surprise to break my silence. Red velvet brownies.


Yes, brownies! Not cupcakes!

That's something kinda new, right? Seems to me it is! :)

Anyhow, I've been wanting to try my hand at baking red velvet cupcakes, but I wanted to shy away from cupcaking, and I didn't want another cookie disaster.

I recently got a new brownie pan from an online shop, and I was excited to try it out. It promised of 15 clean cut brownies in minutes, and I was in for a challenge. The brownie kit had four parts - the baking pan itself with a removable bottom, brownie divider/cutter that you put once the batter is evenly spread out, a serving rack and a serving spatula.

I didn't use the brownie cutter while baking, I opted to use it after my brownies were baked. They still came out perfect. (More on the product review on another post.)

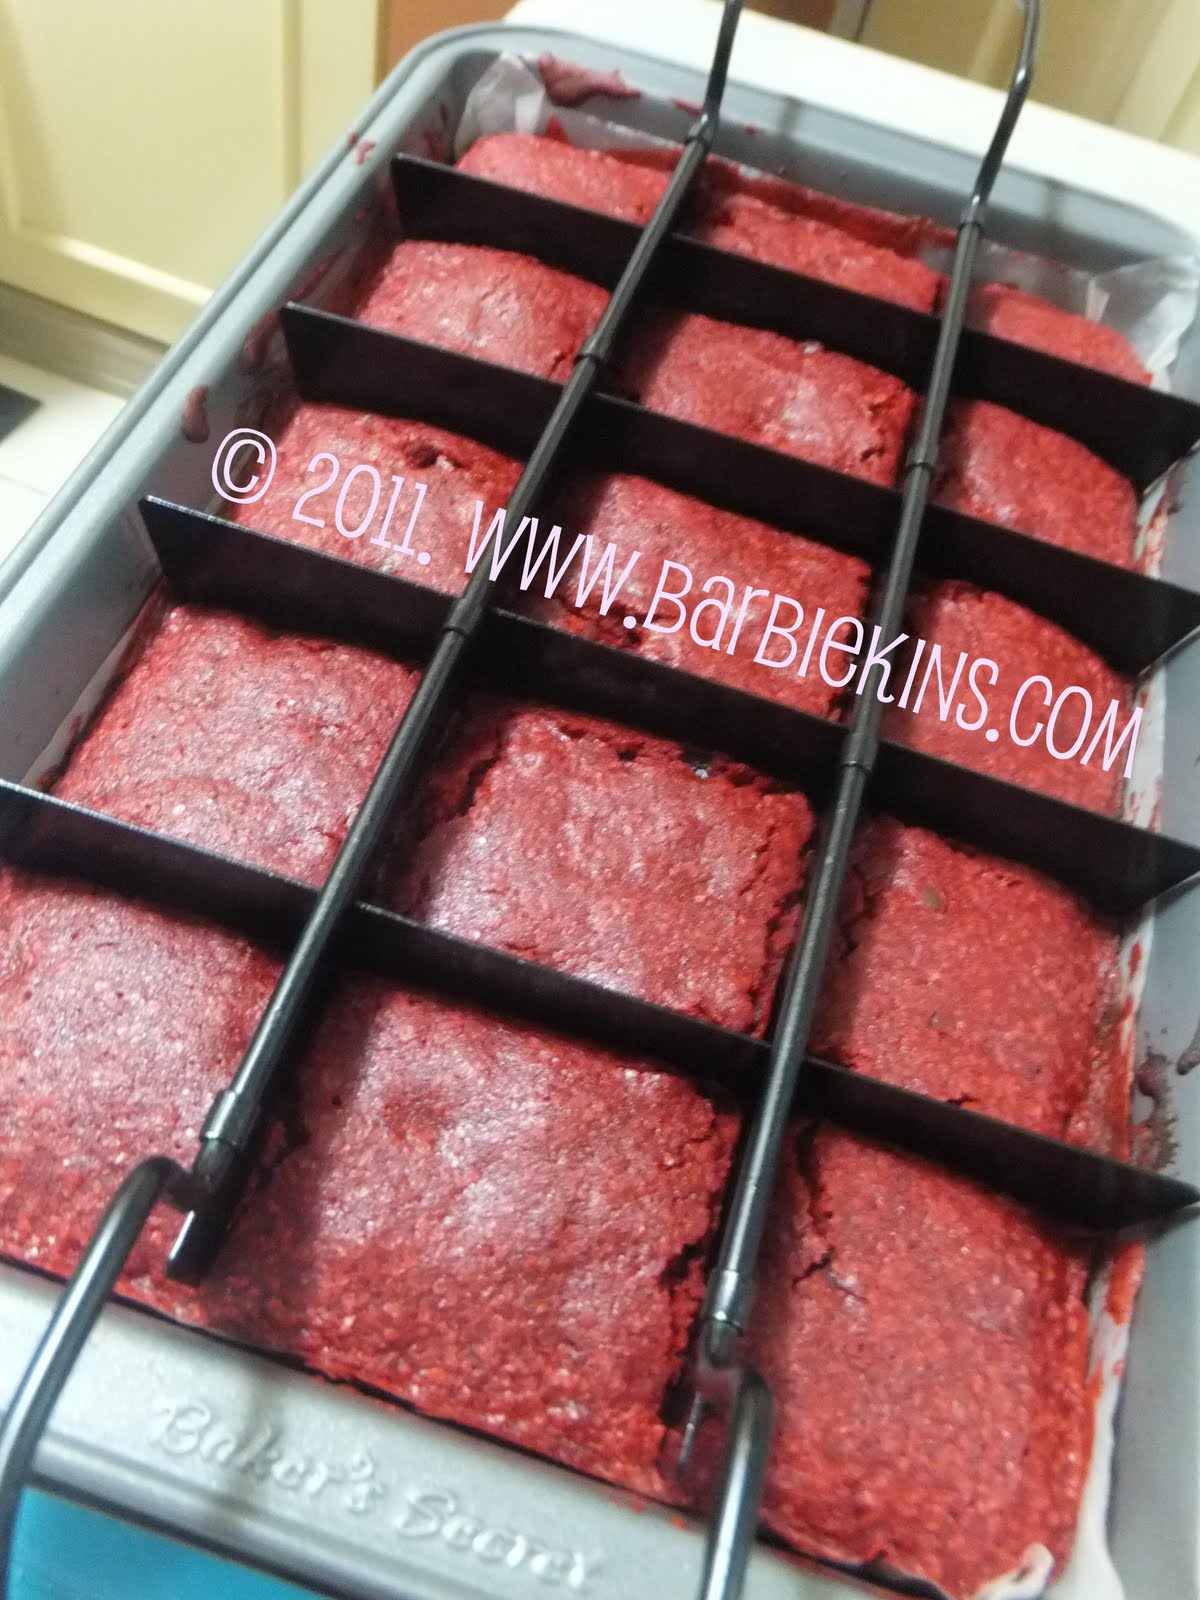
Newly baked and cut. Gotta love my new brownie cutter!


I got the recipe for the Red Velvet Brownies from Jessica of How Sweet It Is. They were perfect. I literally followed it to the last dot.

Enough with my thought bubble. Here you go.

Red Velvet Brownies
From How Sweet It Is 
1/2 cup butter, at room temperature
1 1/2 cups sugar
2 eggs
2 teaspoons vanilla extract
1 1/4 cups all purpose flour
1/4 teaspoon salt
3 tablespoons cocoa powder
2 tablespoons red food coloring
2/3 cups chocolate chips (optional) 
Preheat oven to 350. 
Butter and flour cake pan. I used a 10x7 pan. 
In a small bowl, combine cocoa powder, red food coloring, and 1 teaspoon vanilla to create a paste. 
In the bowl of an electric mixer, cream butter and sugar until fluffy. Add eggs one at a time, then add remaining teaspoon of vanilla. With the mixer on medium speed, add in cocoa powder mixture. Beat until batter is completely red. (If at this time your batter is NOT red, you can add a little more food coloring if desired. Color will depend on brand.) Add flour and salt, mixing until just combined. Fold in chocolate chips. 
Spread in the prepared pan. Bake for 25-30 minutes, or until toothpick inserted in center comes out clean. Let cool completely before frosting.

Ultra red and ready to go in the oven.
Fresh out of the oven.

There you go.

The original recipe used white chocolate frosting. I decided to use a recipe I have been wanting to try - The Best Frosting Ever which I got from Ree of The Pioneer Woman.

Perfect, absolutely perfect combination.

The Best Frosting EverFrom The Pioneer Woman / Tasty Kitchen 
5 tbsp flour
1 cup milk
1 teaspoon vanilla
1 cup butter
1 cup granulated sugar (not powdered sugar!) 
In a small saucepan, whisk flour into milk and heat, stirring constantly, until it thickens. You want it to be very thick, thicker than cake mix, more like a brownie mix is. Remove from heat and let it cool to room temperature. It must be completely cool before you use it in the next step. Stir in vanilla. 
While the mixture is cooling, cream the butter and sugar together until light and fluffy. You don’t want any sugar graininess left. Then add the completely cooled milk/flour/vanilla mixture and beat the living daylights out of it. If it looks separated, you haven’t beaten it enough! Beat it until it all combines and resembles whipped cream.


All whipped up.


Enjoy!


***

All recipes are copied from the sources.